Project Evaluation & Submission
Complete guide to creating, managing, evaluating projects in ByteXL.
1. How to Create Projects
To create a new project, you need to provide the following information:
- Title: Name of the project
- Description: Detailed description of what the project contains
- Score: Maximum score that can be awarded for this project (optional)
You can manually fill in these details, or use the AI-powered feature to generate the title and description automatically.
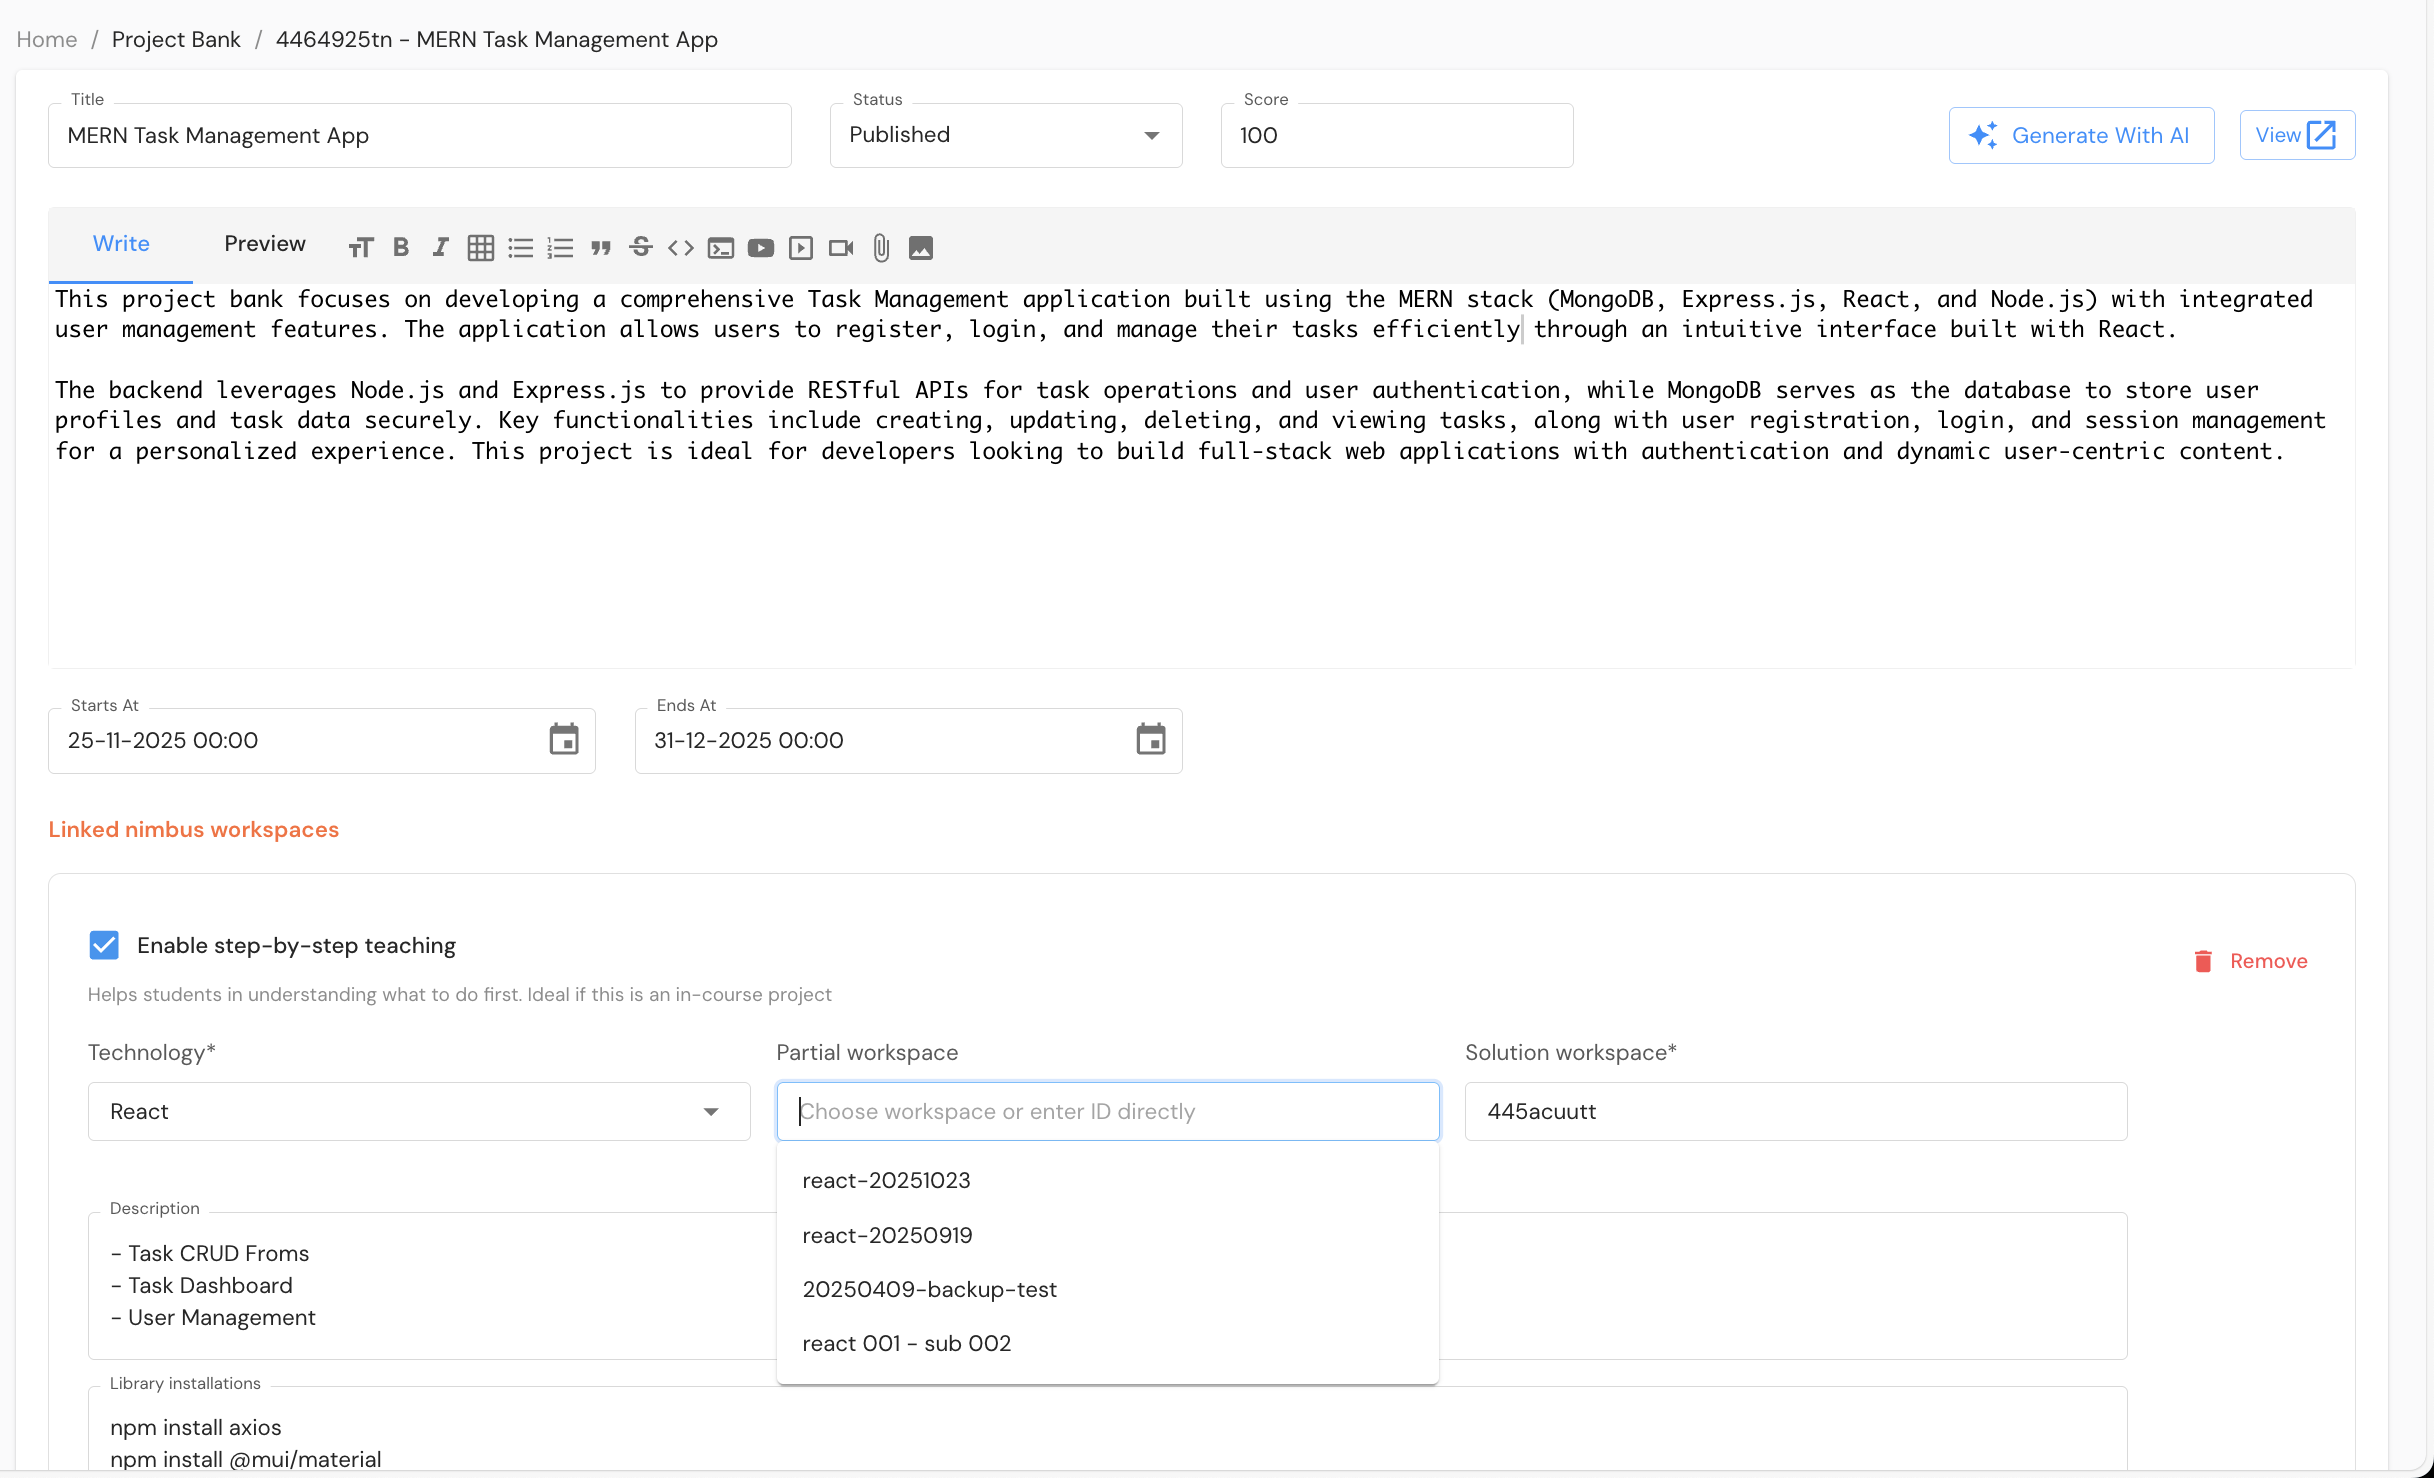
AI-Powered Creation
Simply click on the AI icon next to the title or description field, and the AI will generate relevant content based on your requirements.


2. Add Projects
Once you've created the project, you can add individual workspaces to it. For each workspace:
- Choose Technology: Select the programming language or technology stack for the project
- Attach Template Workspace: Link a Nimbus workspace that serves as a template.
- Either choose from the filtered dropdown, from your workspaces.
- or, manually enter the workspaceId
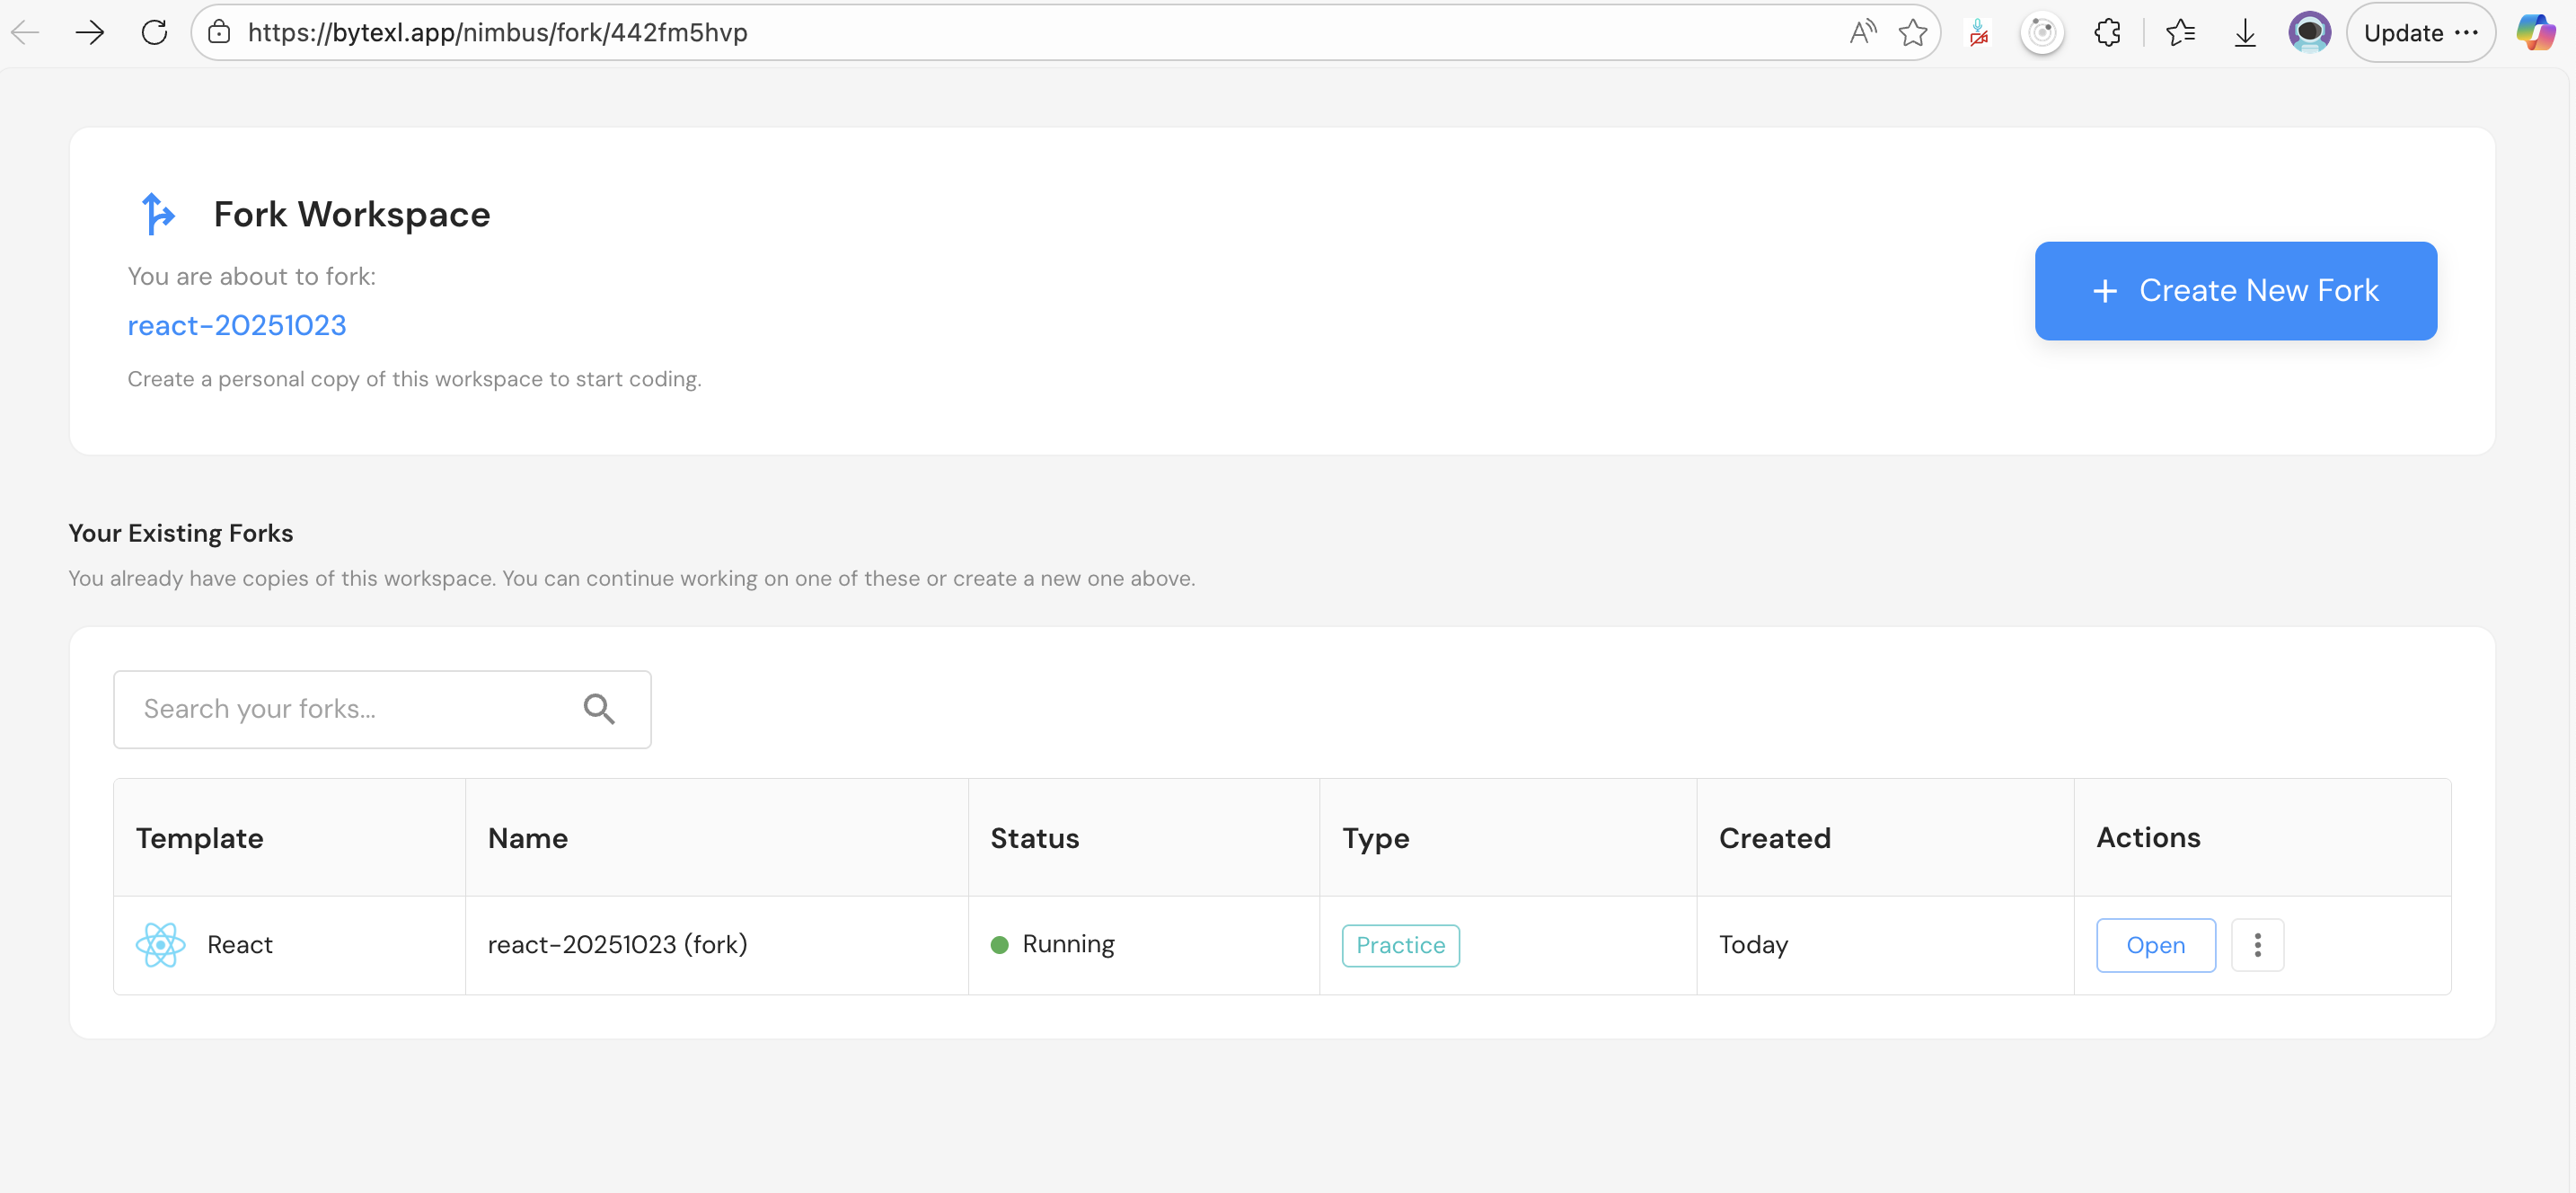
- Students will be able to Fork this template workspace
- They can continue their project development on top of the existing template code
- This provides a starting point while allowing students to build upon it
3. Preview Project
Before publishing the project to students, you can preview how it will appear to them.
Use View button on Edit page to preview the project.
This allows you to:
- Review the project structure
- Verify all information is correct
- Check that template workspaces are properly linked
- Ensure the project is ready for publication
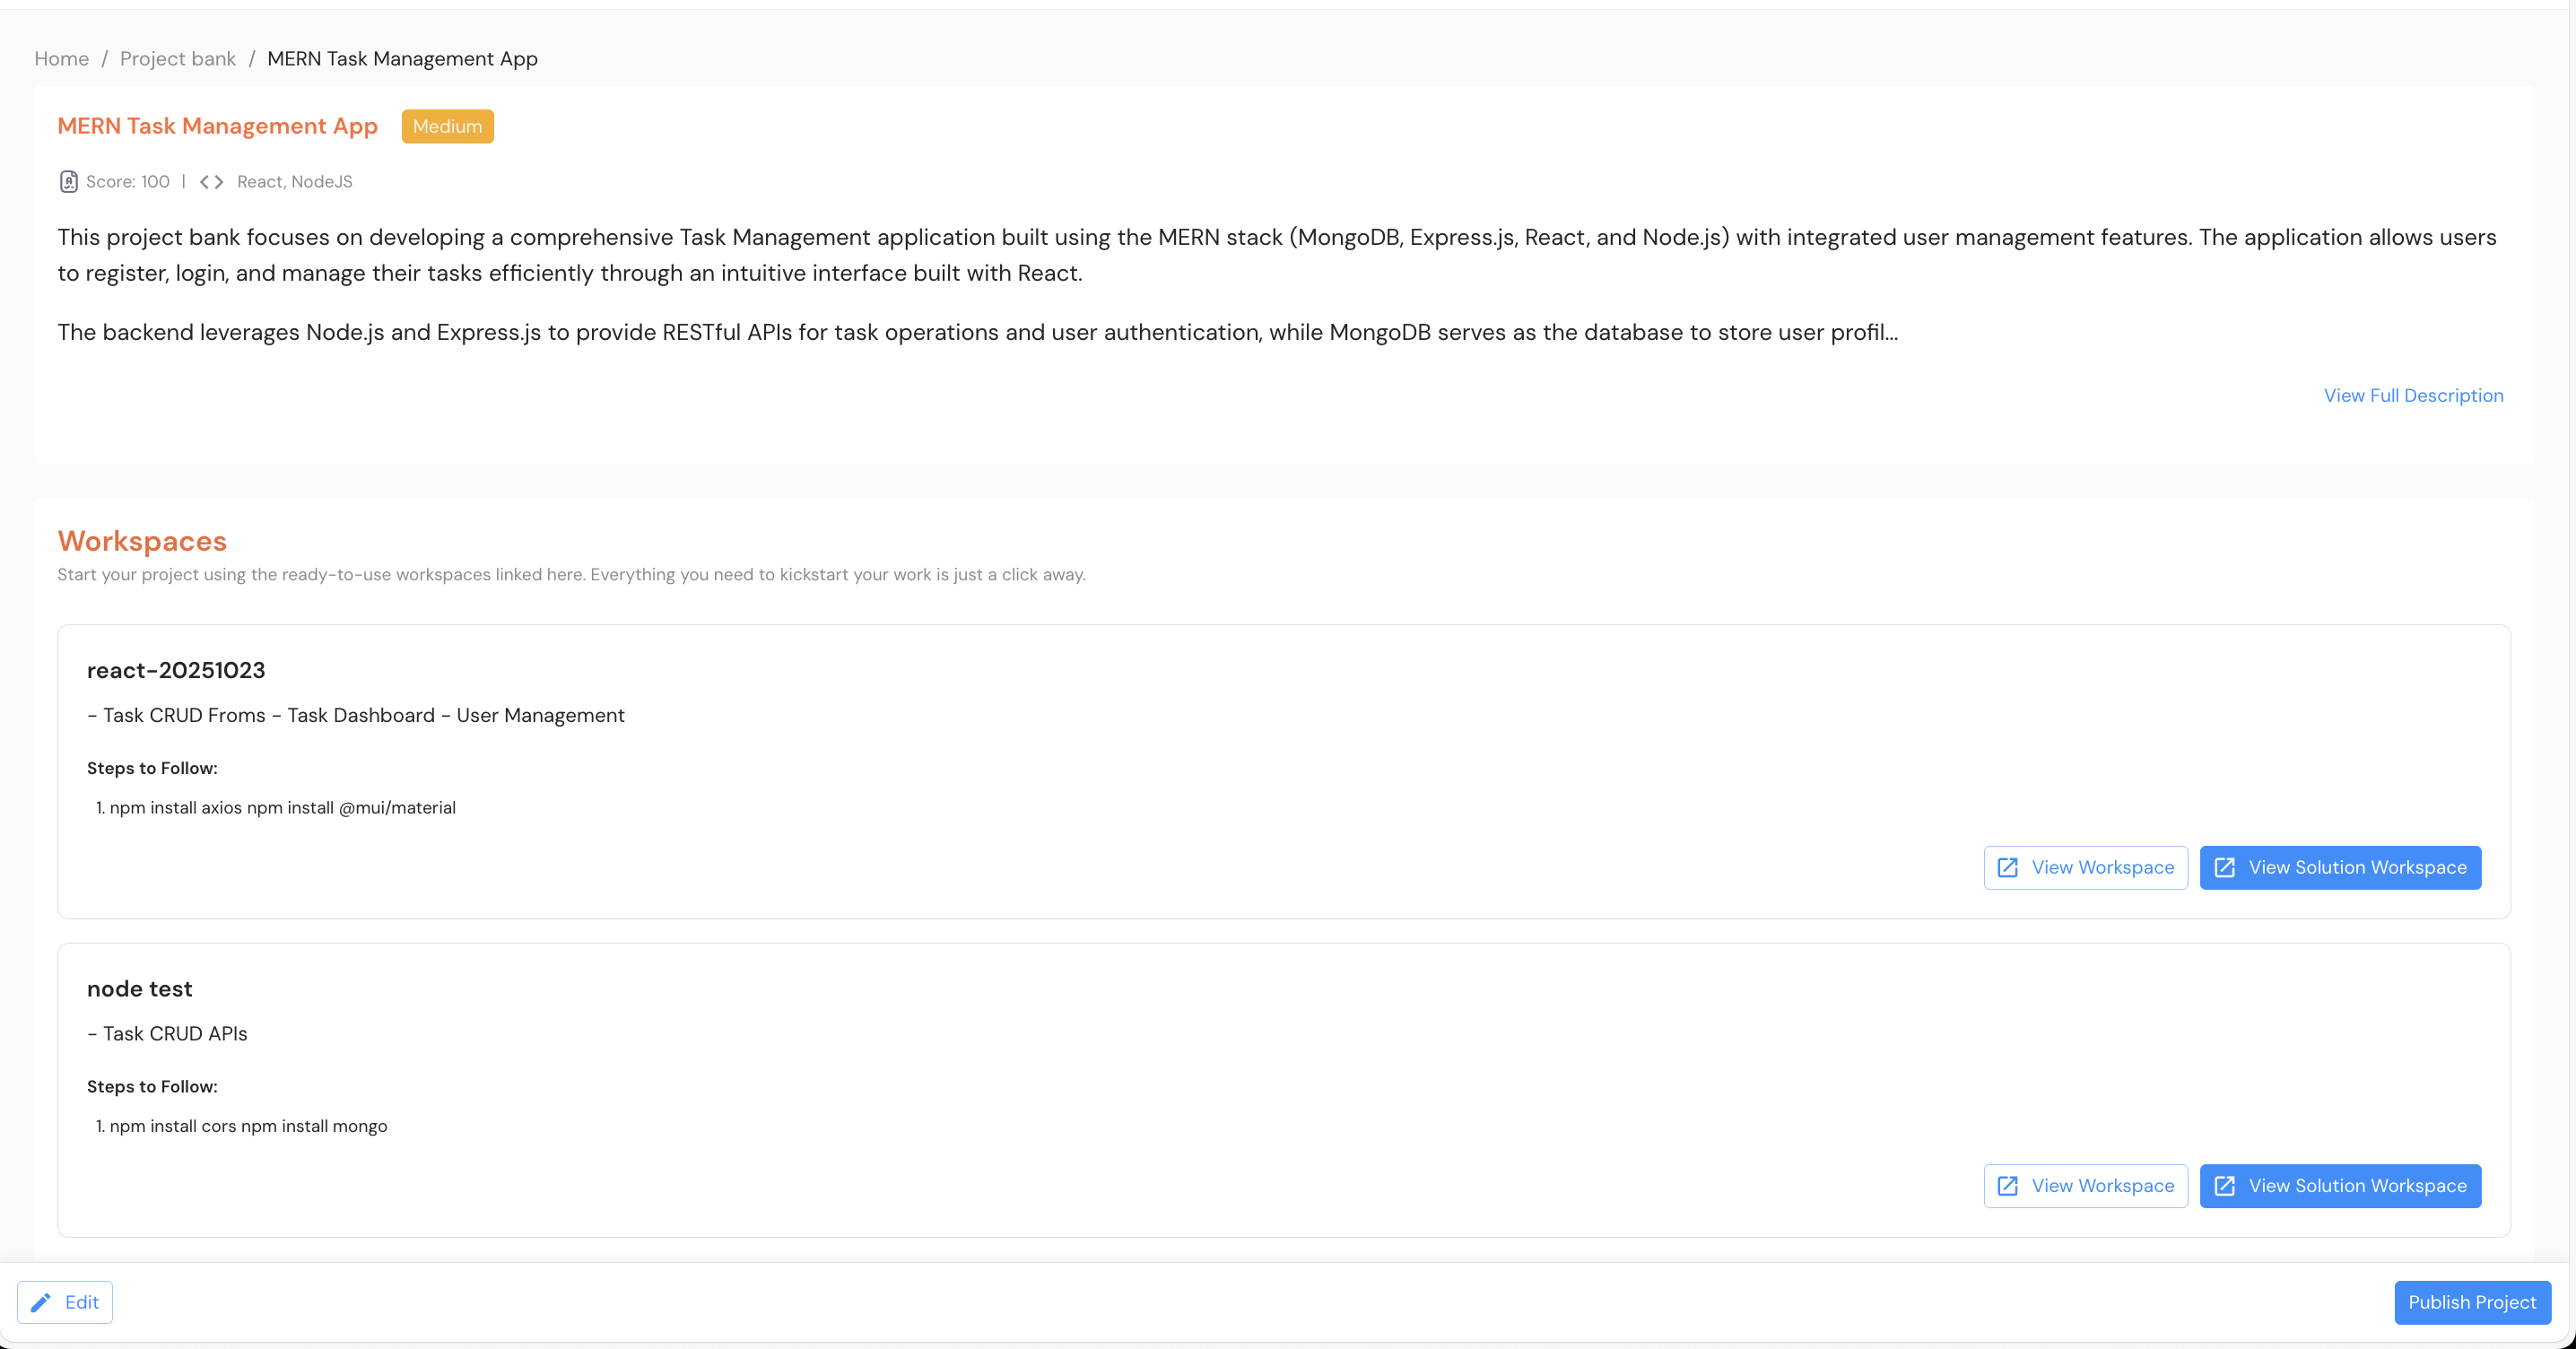
Once done, you can publish the project to make it available to students.
4. Student View
After a project is published, it becomes visible to students. They can:
View Available Projects
Students can see a list of all published projects and their associated workspaces.
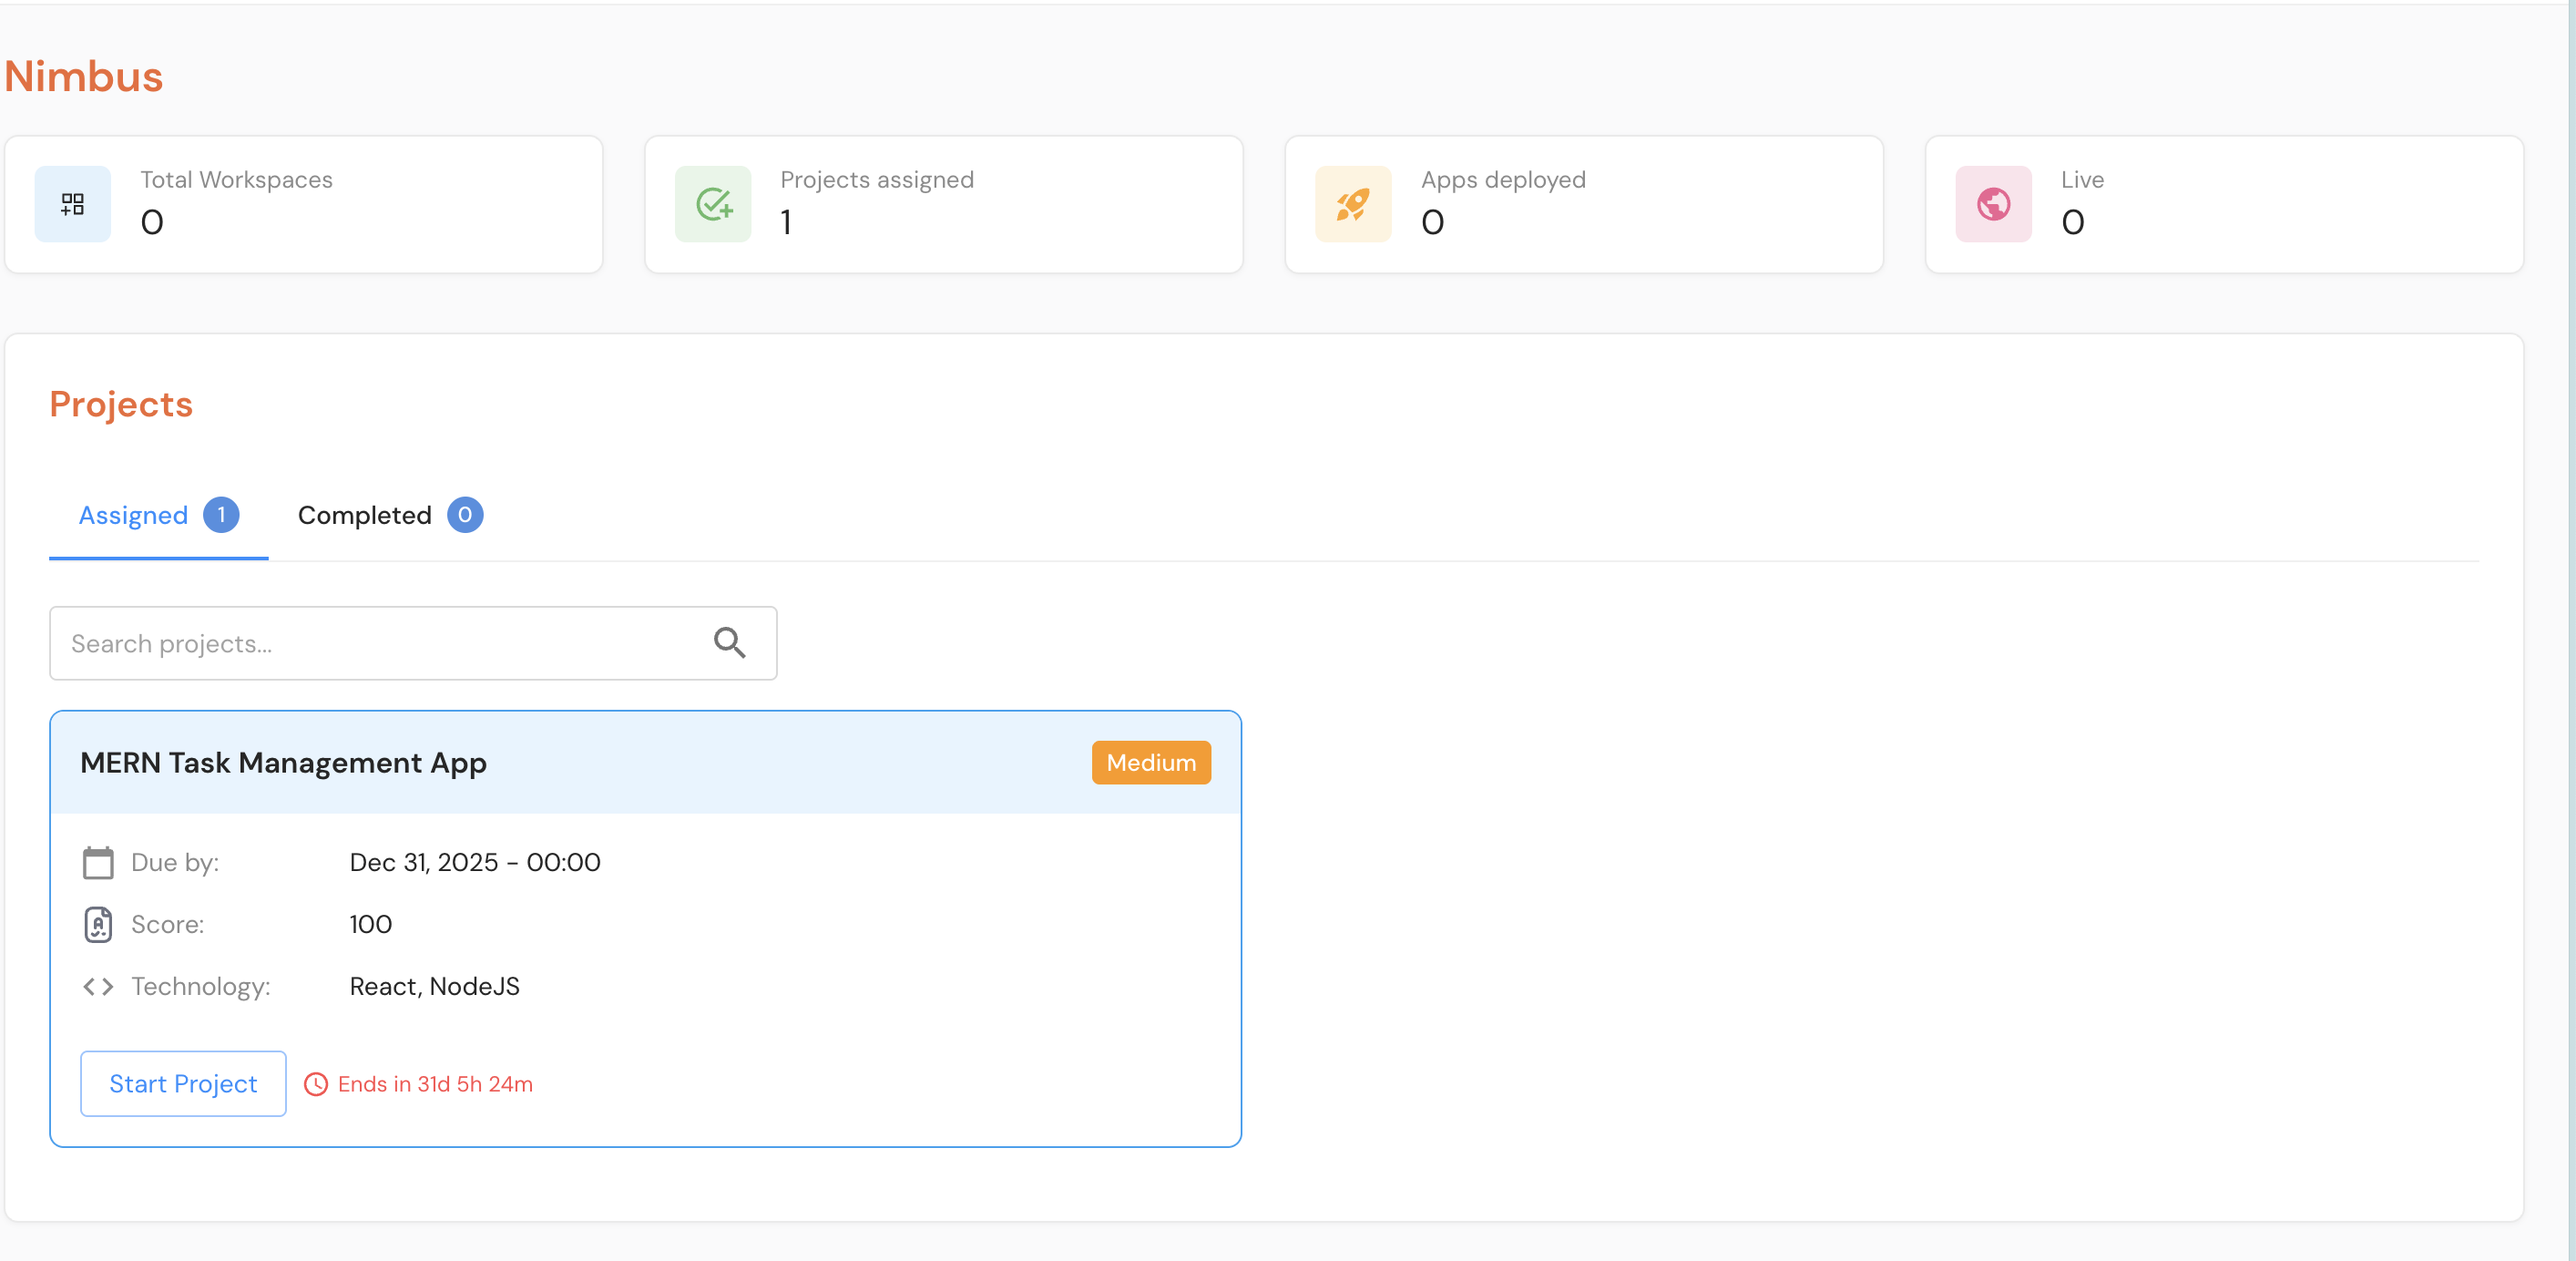
View Project Details
Students can click on a project to see detailed information including:
- Project description
- Technology requirements
- Template workspace details
- Submission requirements
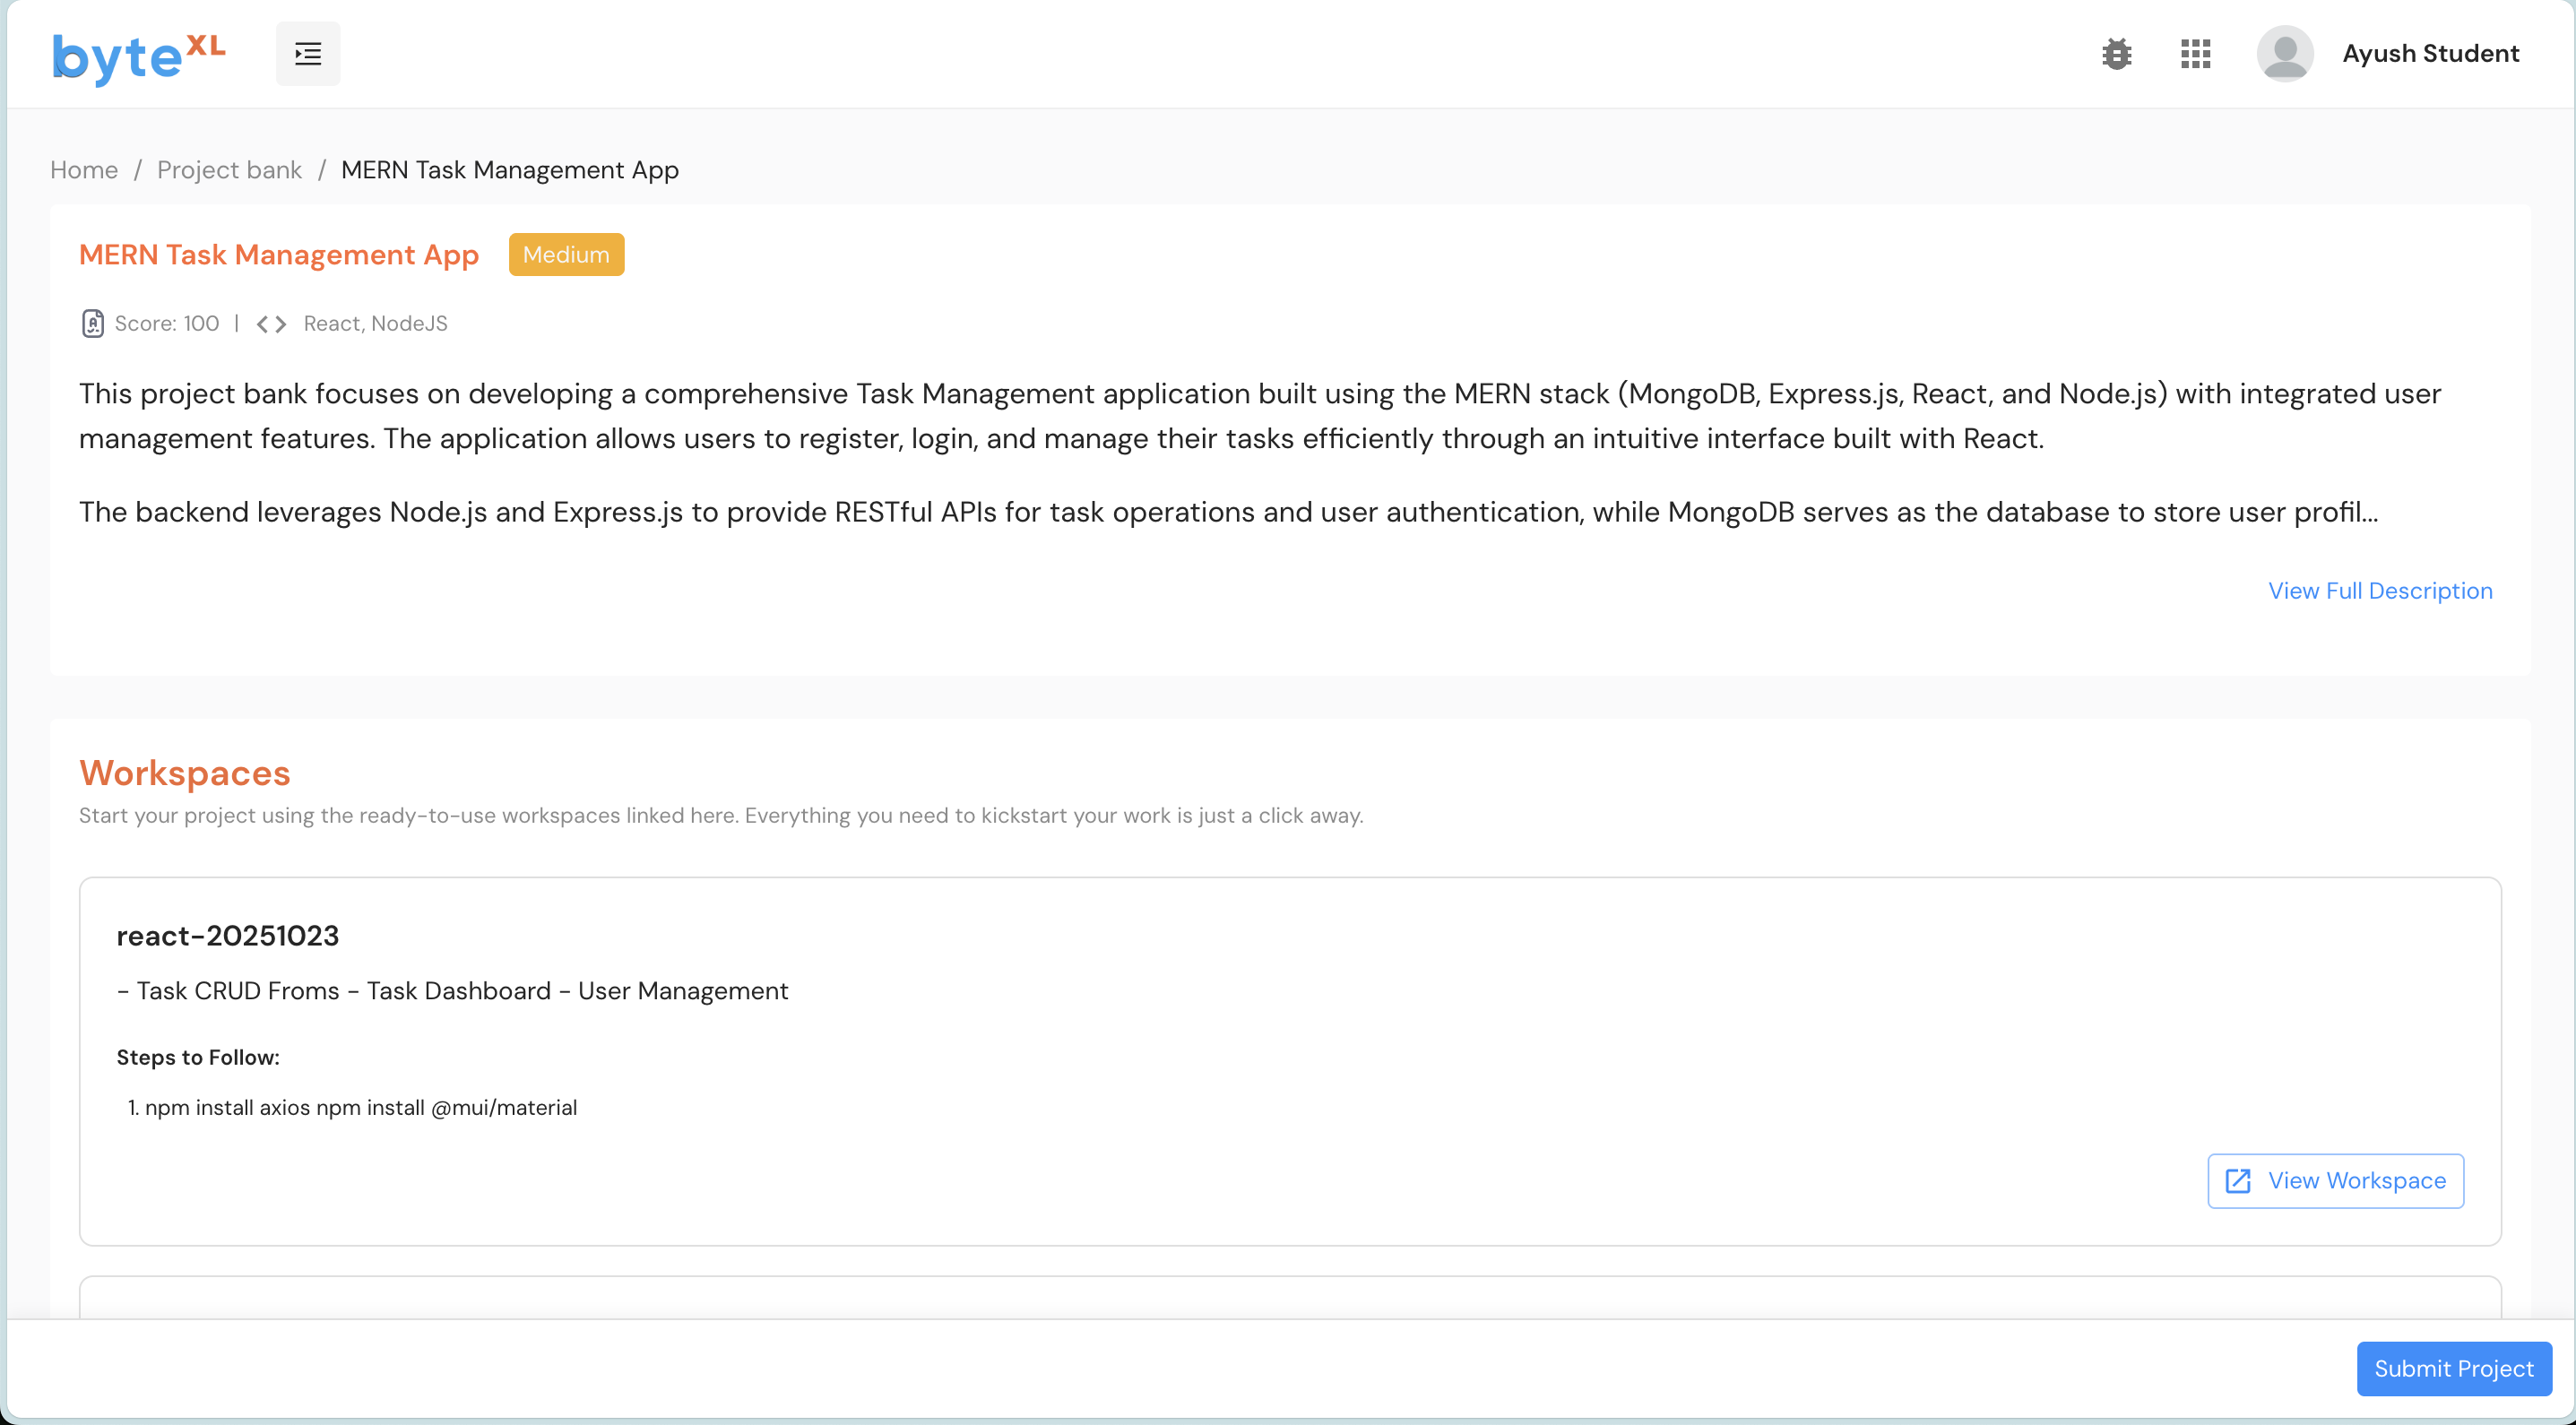
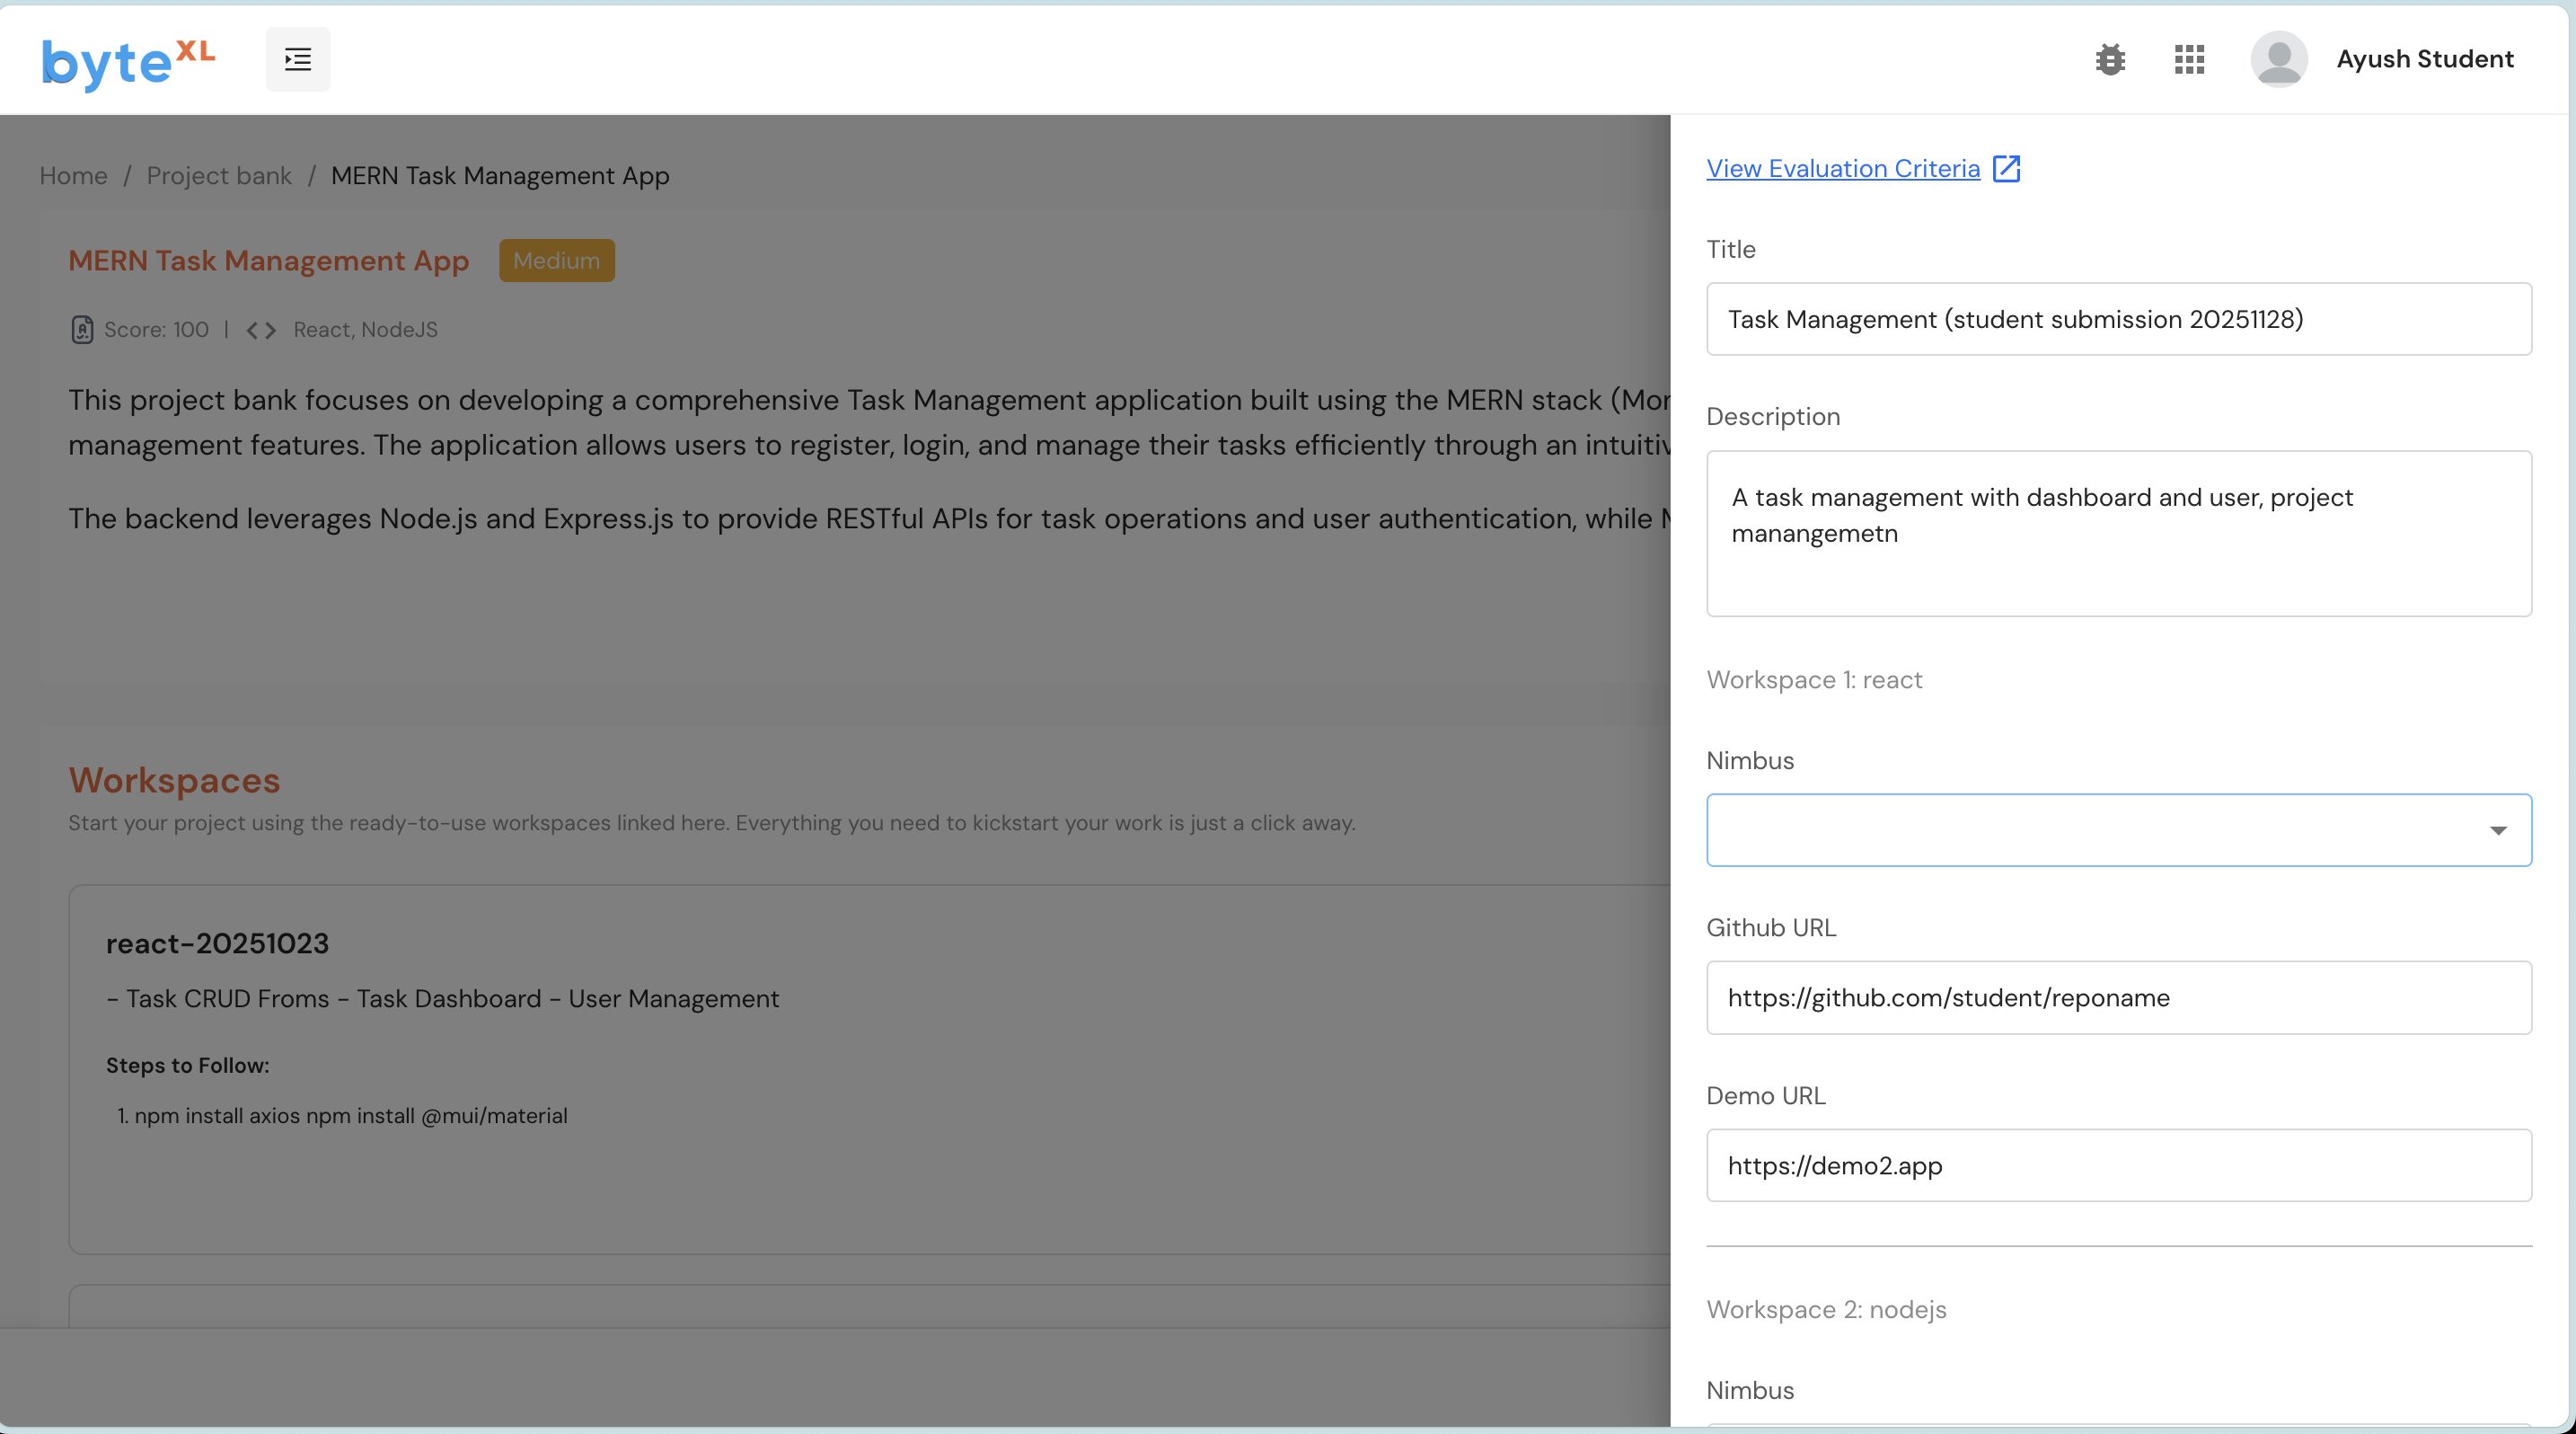
Submit Projects
When submitting their work, students can attach:
- Workspace: Link to their Nimbus workspace where they've developed the project
- GitHub URL: Link to their GitHub repository containing the project code
- Demo URL: Link to a live demo or deployed version of their project
Students can submit multiple items corresponding to each workspace in the project. For example, they might submit both a workspace link and a GitHub URL for the same project.
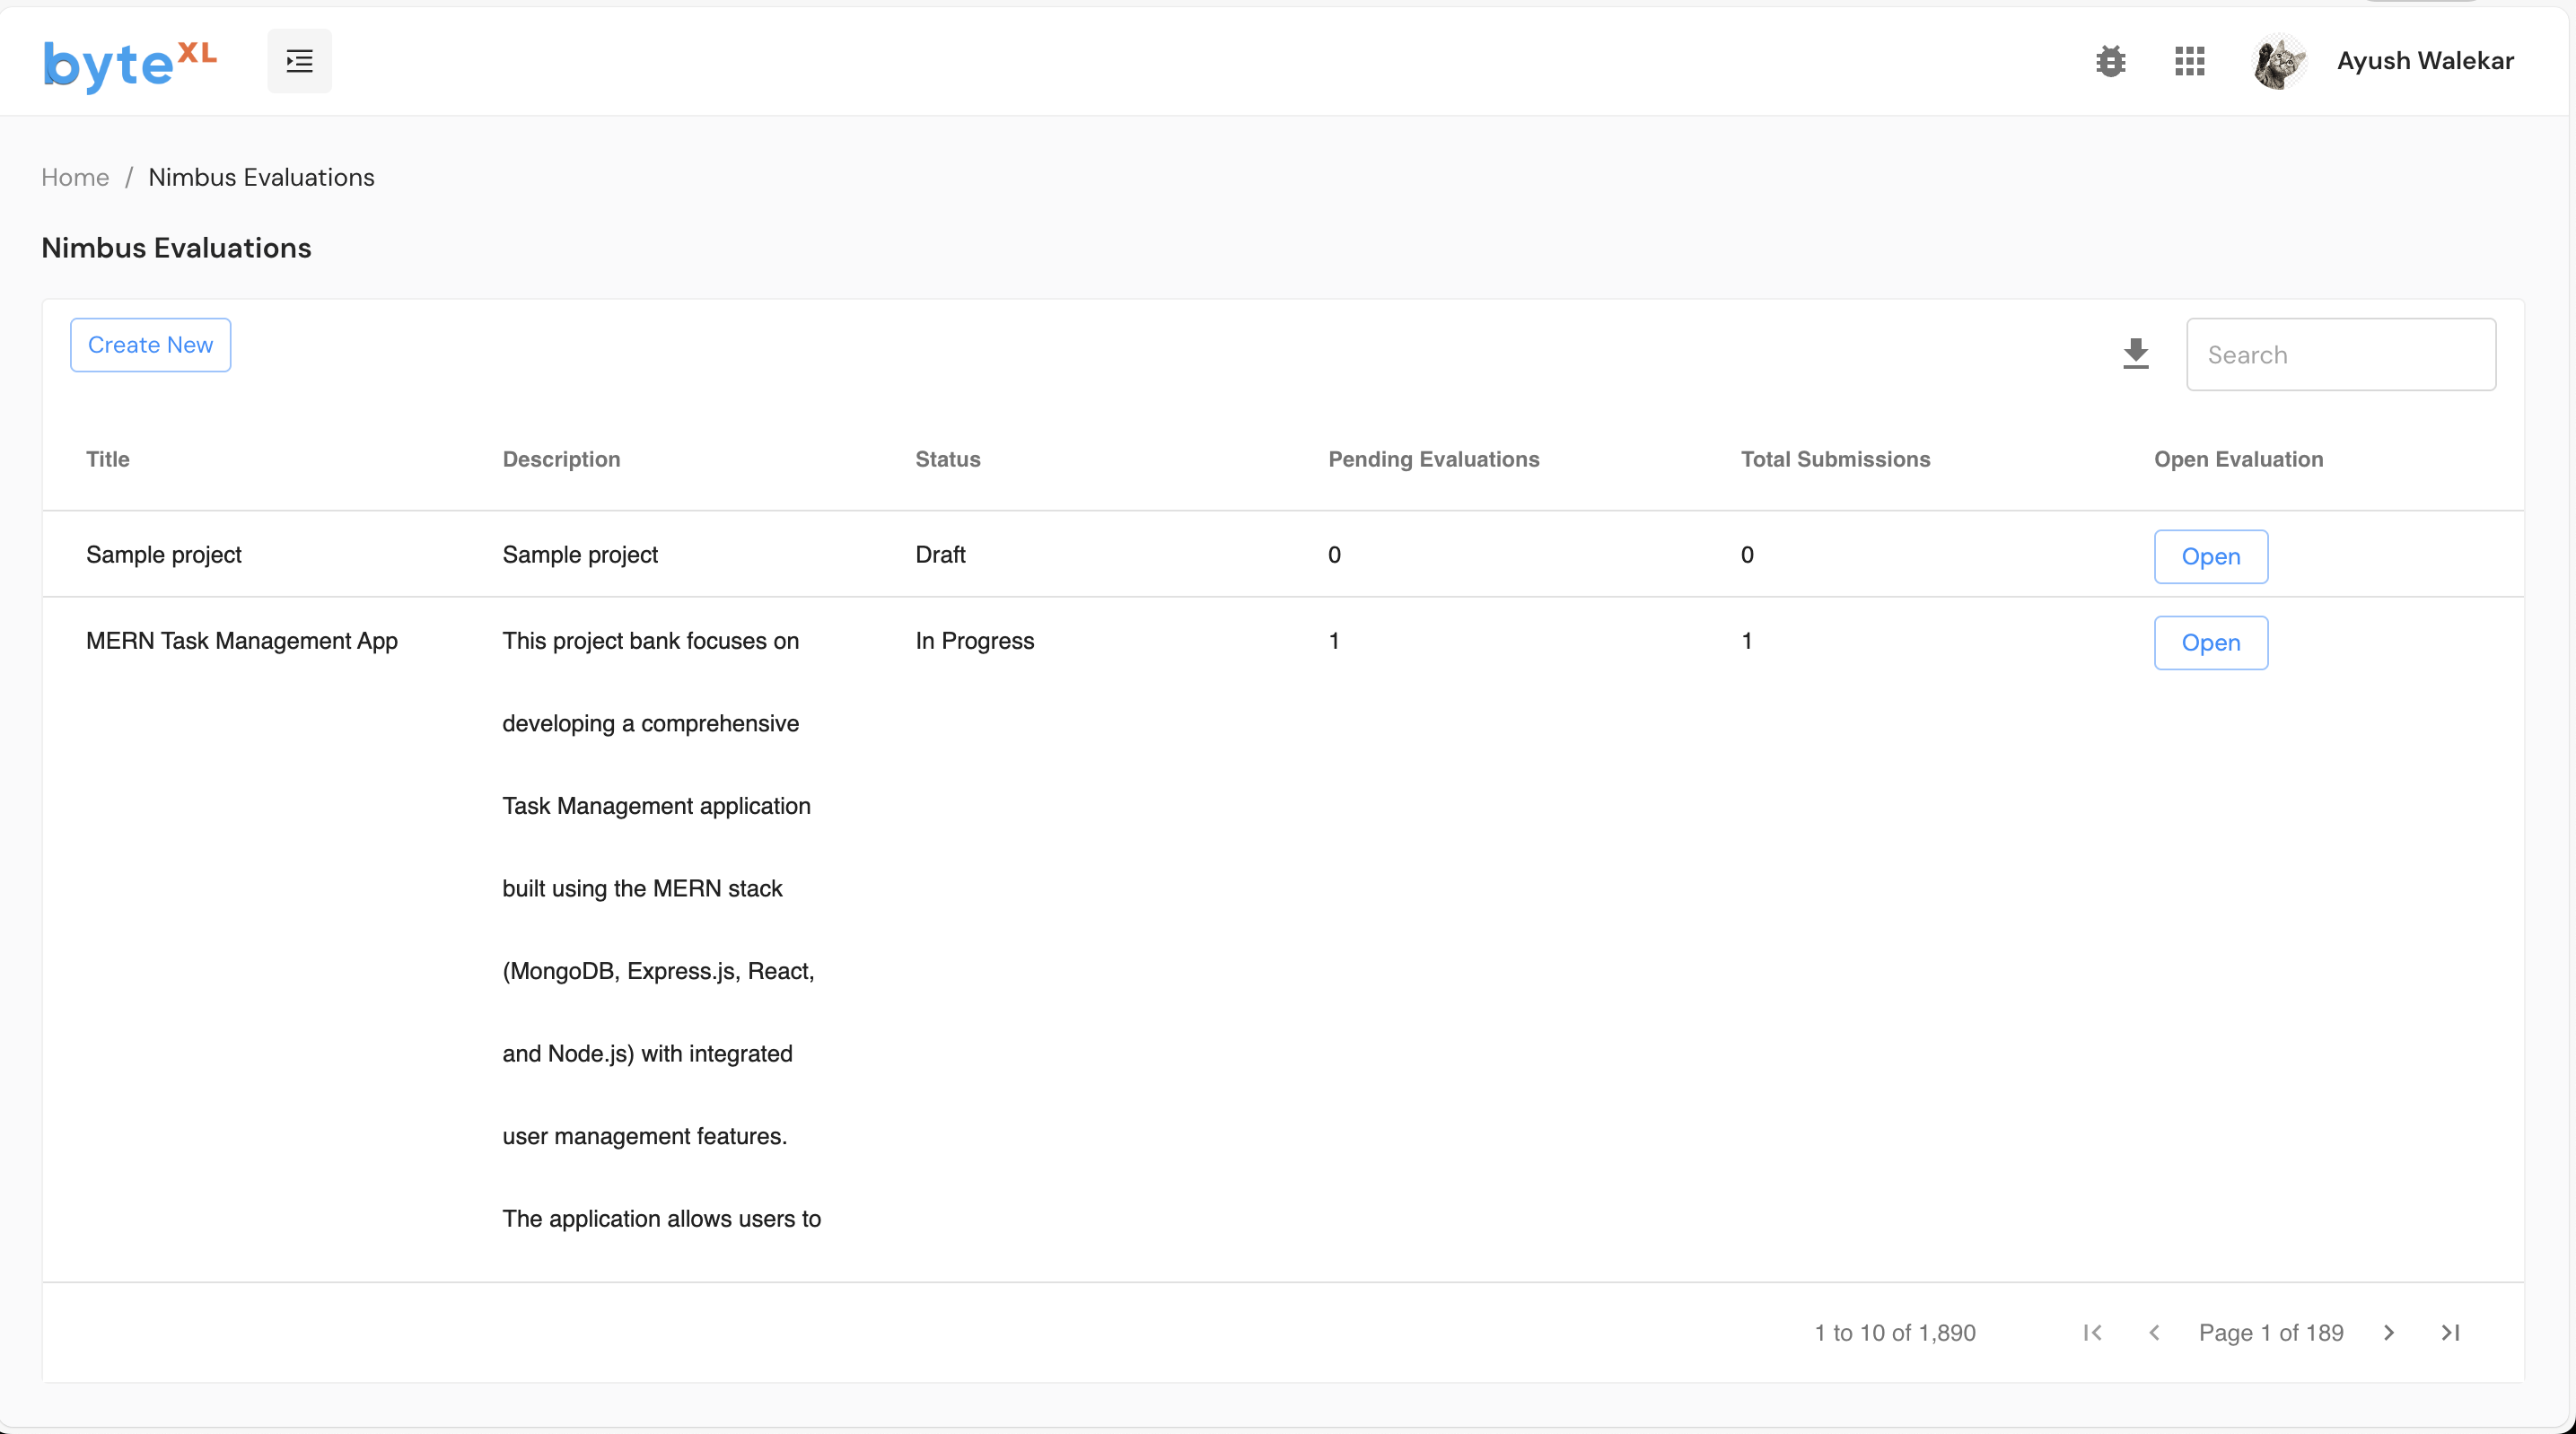
5. Evaluation
Trainers can evaluate student submissions through the evaluation interface. The evaluation flow includes:
View Submissions
Trainers can see all student submissions that require evaluation, organized by project.
Evaluate Submission Details
For each submission, trainers can:
- Review the submitted workspace, GitHub URL, or demo URL
- Access the student's code and implementation
- Test the submitted project
- Provide feedback and assign scores
- Add comments and notes
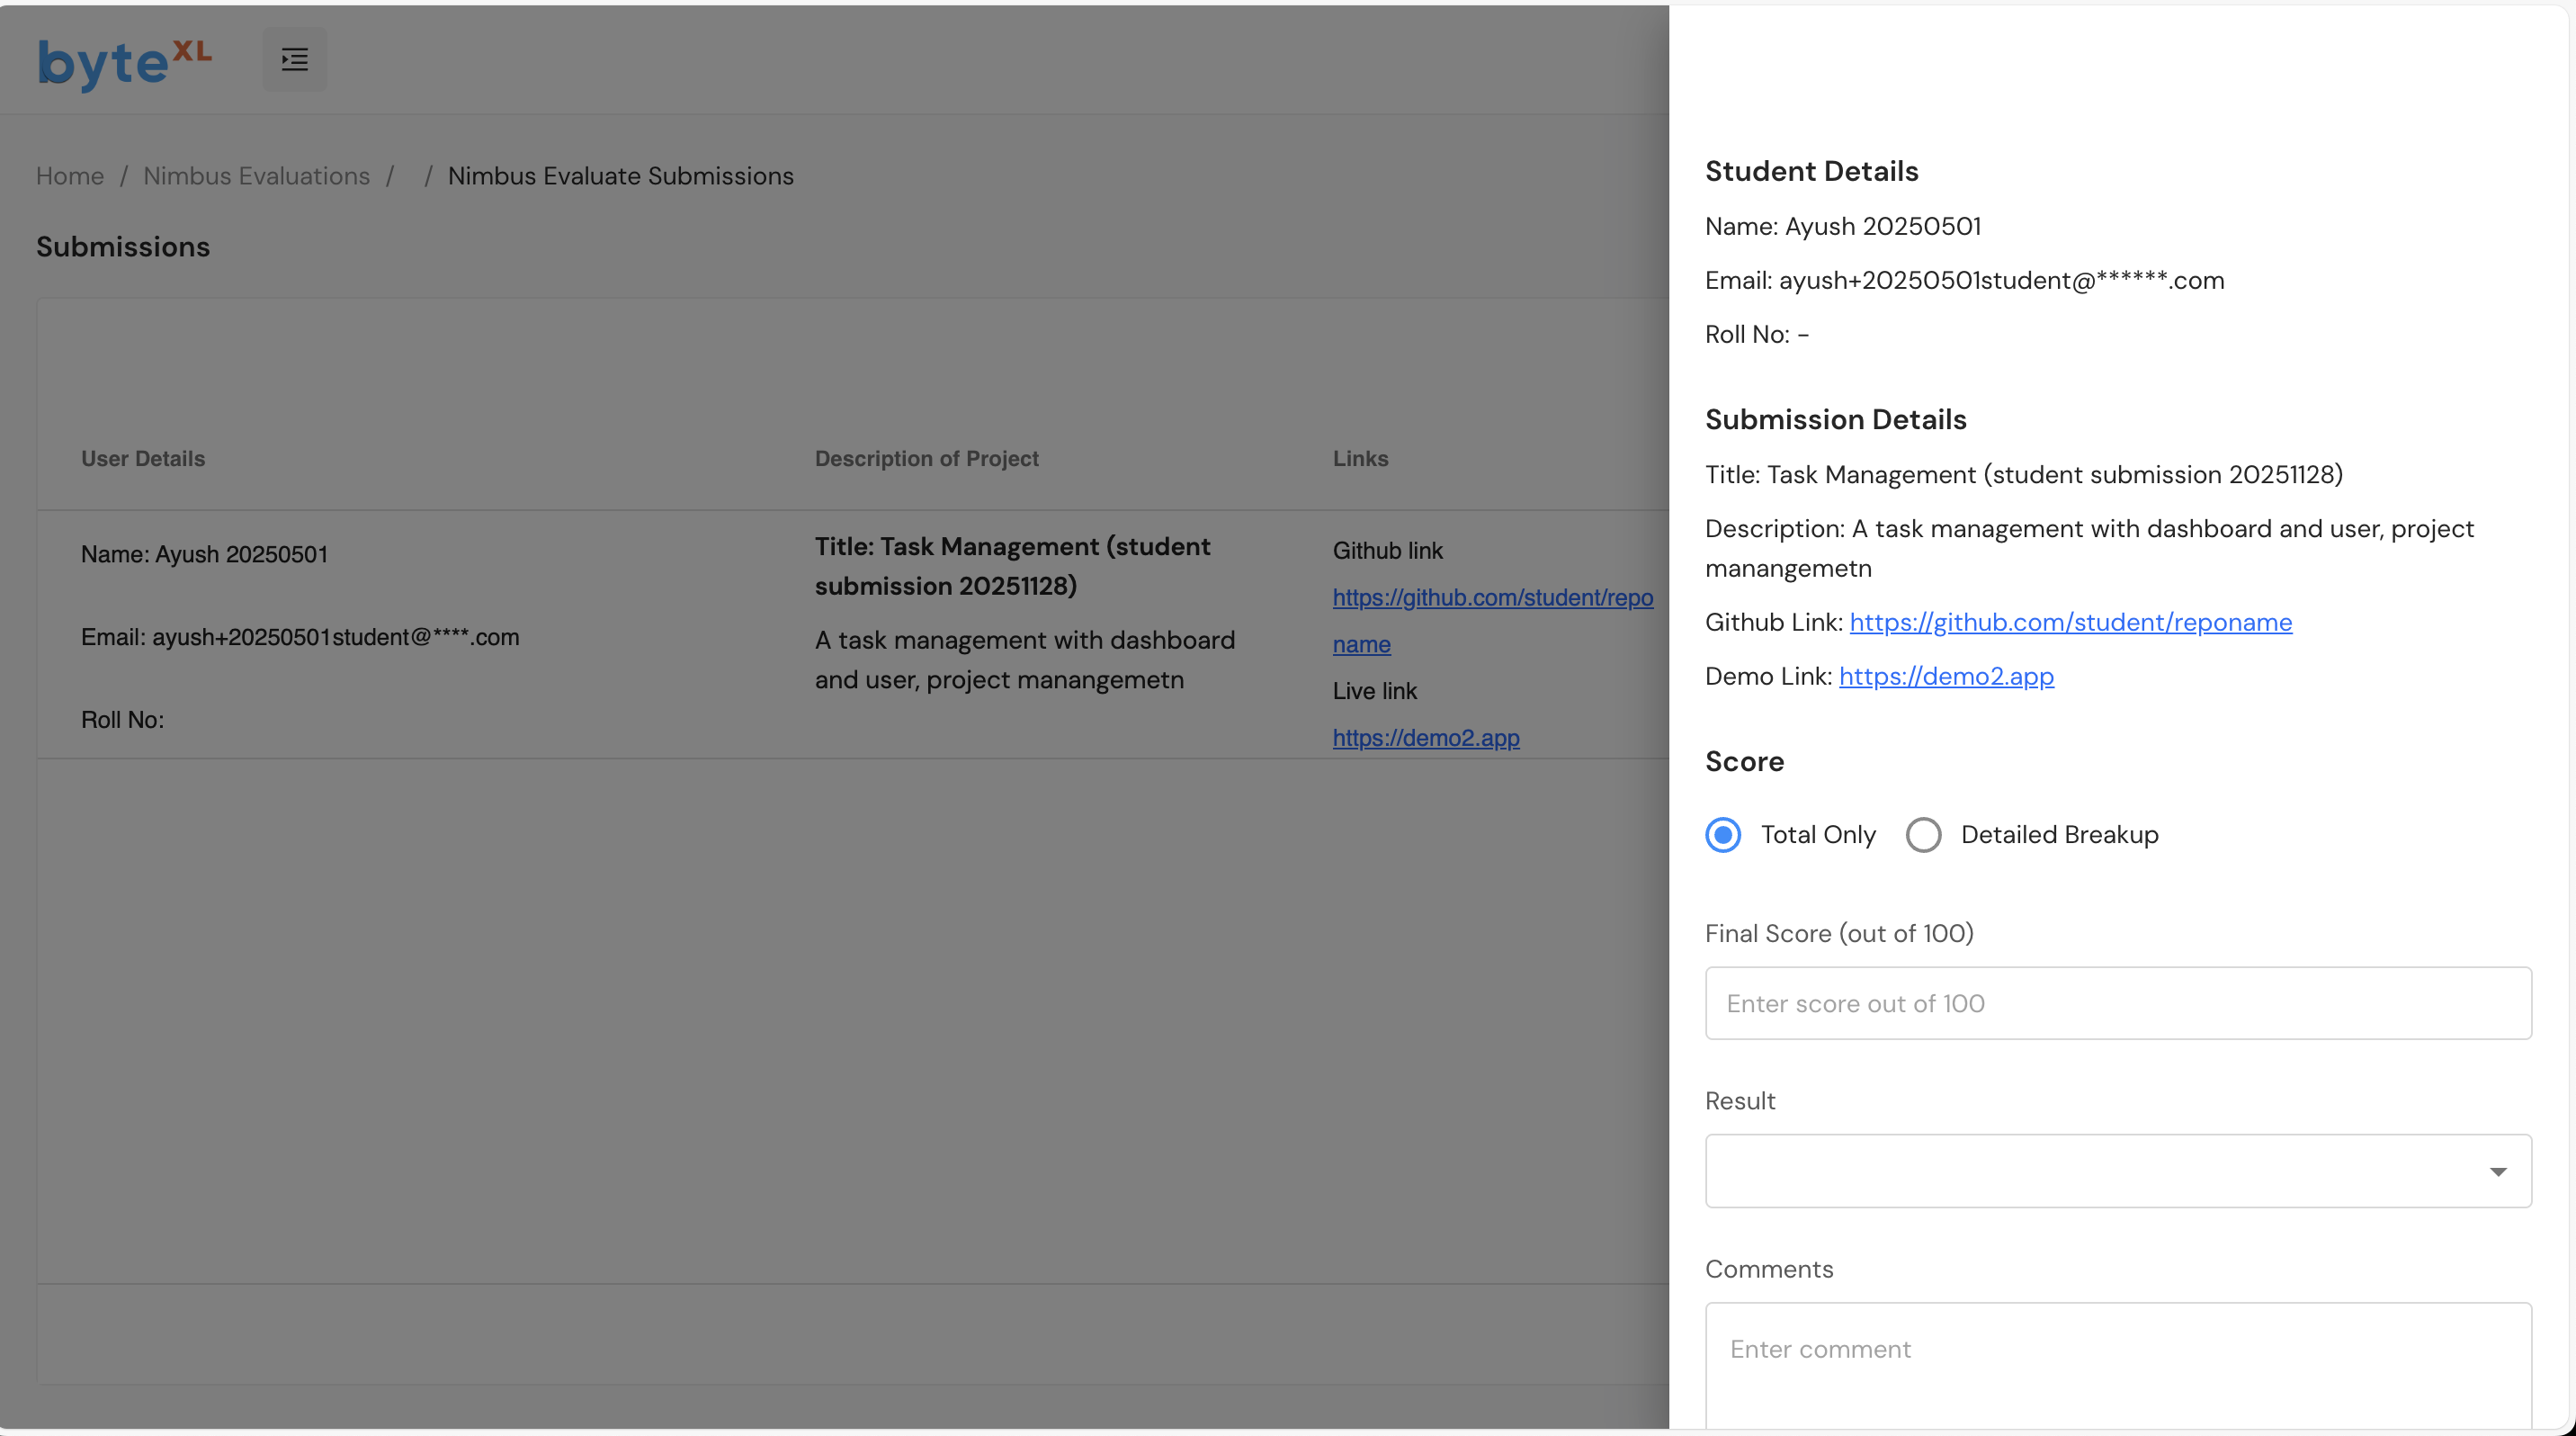
The evaluation interface is currently using the existing /nimbus-evaluations flow. An updated evaluation interface is coming soon.